Are you looking for a new way to enjoy your favorite e-juice? If so, then making your own homemade vape may be the perfect solution. With the right tools, ingredients, and instructions, you can easily create your own vaporizing device in the comfort of your own home. In this guide, we’ll take you through the steps for making a homemade vape so you can start enjoying your favorite flavors without having to buy a store-bought device.
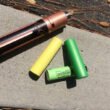
Making a homemade vape is a simple task that can be done with common household items. To start, gather together a plastic bottle, a hot glue gun, a pen tube, a lighter, and a small plastic container.
- Begin by using the hot glue gun to attach the pen tube onto the plastic bottle.
- Next, fill the plastic container with water, and place it inside the bottle.
- Put the lighter near the top of the bottle, and hold it there for a few minutes.
- Once the plastic bottle is hot, remove the lighter and place your vaping material inside.
- Put the cap back on the bottle, and inhale from the pen tube.
You now have a homemade vape that can be used to enjoy your vaping material.
Creating Your Own Vape Device
Making your own vape device allows you to customize your vaping experience. Not only can you choose your own flavors and nicotine levels, but you can also determine the size, shape, and design of your device. With some knowledge and the right materials, you can easily create a homemade vape and begin to enjoy the benefits of vaping.
Gather Materials and Tools
You will need a few basic materials and tools before you can start making your own vape. Here is a list of the essential items you will need:
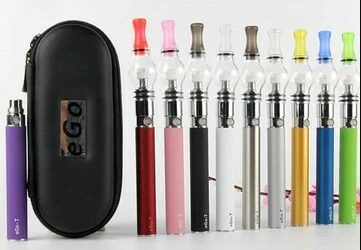
- Vape mod
- Vape tank
- Coil
- Vape juice
- Cotton
- Screwdriver
- Wire cutters
Assemble the Vape Mod
The first step in creating your own vape device is to assemble the vape mod. This is the part of the device that houses the battery and controls the voltage. To assemble the mod, you will need to connect the battery and the wiring. Then, use the screwdriver to attach the tank to the mod. Be sure to tighten the screws so that the tank is securely attached.
Attach the Coil and Cotton
Once the vape mod is assembled, you can begin attaching the coil and cotton. Start by unscrewing the tank from the mod. Then, insert the coil into the tank and attach it to the base. Next, cut a piece of cotton and insert it into the coil. Finally, reattach the tank to the mod and tighten the screws.
Fill the Tank with Vape Juice
The next step is to fill the tank with vape juice. Before doing this, be sure to check the instructions that came with the tank to determine which type of vape juice is compatible with the device. Then, use a dropper or syringe to fill the tank with the desired amount of juice.
Set the Voltage
Once the tank is filled with vape juice, it is time to set the voltage. This will depend on the type of device you have, so be sure to consult the instructions that came with the mod. Generally, you will want to set the voltage to the lowest setting since this will provide the best flavor and vapor production.
Enjoy Your Homemade Vape
Once you have assembled the vape mod and filled the tank with vape juice, you can now enjoy your homemade vape! Be sure to start at a low voltage and gradually increase the voltage until you find the settings that you prefer. Now you can enjoy your customized vaping experience!
Related FAQ
What Are The Necessary Materials?
What Is The Best Battery To Use?
How Do I Make The Heating Element?
What Is The Purpose Of An Atomizer?
What Is The Best Material For A Mouthpiece?
How Do I Put The Vape Together?
In conclusion, making your own homemade vape isn’t as difficult as it may seem. With the proper supplies and a little creativity, you can create a custom vape that will make your friends jealous. Not only is it a fun activity, but it also saves you money and helps you avoid the additives and toxins that are sometimes found in pre-made vapes. So, if you’re looking for an easy and affordable way to enjoy your favorite flavors, give homemade vaping a try!